Every user of a removable steel pool has had to face at some point, changing the liner of removable pools. It may have lasted a few months or many years, but it is an essential piece of the pool that needs to be renewed sooner or later.
In this article, we will provide you with some helpful steps to know how to place the liner in a pool. Read along with me.
Step One
Read also: Tips for Cleaning a Swimming Pool.
They usually come with instruction manuals. Here what we will expose are the tricks so that it is perfect and the duration is maximum. If our liner has lasted less than 3 or 4 bathing seasons, we are doing something wrong.
Step Two
First, we would have to analyze the surface on which we are going to place the liner. The removable pool must be placed on a level surface. This point is critical since, if not all, the water pressure will be concentrated at one point of the pool instead of being distributed equally.
If we have already fulfilled this point, we have to check the texture of the surface. Micropores may appear due to the action of small pebbles or imperfections in the concrete platform. This possible fault is easily fixed by placing a floor mat between the liner and the surface to be installed.
Step Four
The liner's quality is decisive in its durability, which is mainly measured by its thickness. The thicker it is, the more robust; There are qualities on the market from 20 microns - it is usually expressed in the form 20/100 - to 75 microns, a medium liner between 35 and 40 microns.
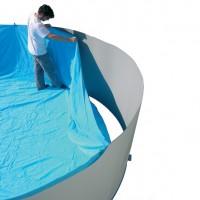
During the installation of the liner, some tricks and details must be taken into account that, together with the normal installation instructions, will make it look perfect and last much longer:
- No matter how big or heavy the liner may be, it should never be dragged off the floor mat.
- We will take off our shoes during the installation and only step on it with socks or bare feet.
- We will place the liner (following the different instructions) without making any cut even if they tell us.
- Once placed, we will fill the pool with just 2 or 3 fingers of water. This will allow us to be able from the center to the sides to remove the wrinkles that will have remained. Adjusting the edges of the liner to the edges of the pool. There must be no wrinkles as they are weak points where the liner can end up cracking.
- Once stretched, we will fill the pool to a few centimeters below the outlet valve. At this point is when we will place the skimmer and valve, which means that we will have to cut the liner with a cutter.
- First, the skimmer is placed, and then with a cutter, it is cut through the inner frame. This will allow us to have a much less hole than if we cut it previously. And if we have to disassemble and reassemble the pool, we will appreciate it.
- To place the valve, we will make a small cross-shaped cut. When inserting the valve, part of the liner will remain on top of the thread, which will help together with the Teflon to have a greater seal.
Adapted and translated by The Cop Cart Staff
Sources: Uncomo


